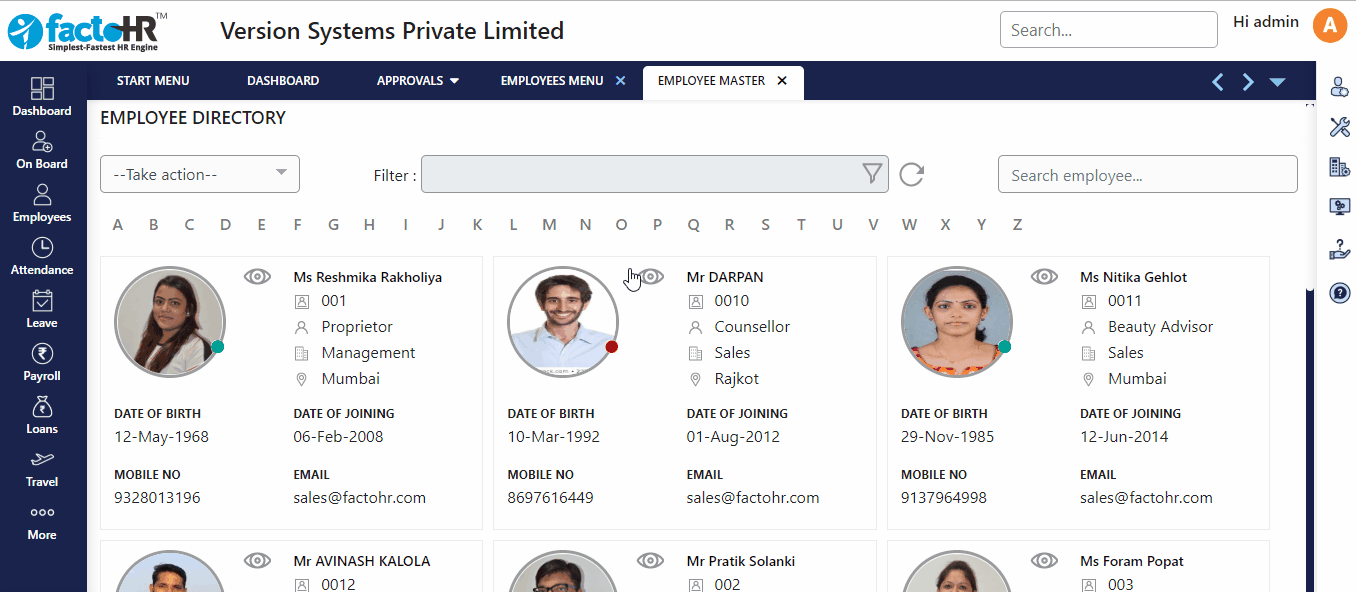
Clicking on Employee master will first show you Employee Directory. Here, list of employees is displayed with their basic information and profile picture.
On top left corner of the Employee Directory screen there is Take Action drop down list. From here you can add employee into the system directly or by importing template.
From Filter you can search employees by filtering through categories like Branch, Department, etc., or by employee status.
A search box is provided on the top right hand side of employee directory screen. You can search employee by their Employee Code or Name. A button is provided on search box to search only Active, Inactive or all employees.
Below Filter box Alphabet letters are provided to filter employees alphabetically by clicking it.
To clear all the search options and filters and to view all employees list click on Refresh button placed after Filter box.
Kindly review attached visual demo for better understanding.
- To add a new employee click ‘Take action’. [On the top left scree of employee master]
- A drop down will appear with 2 option:-
1) Create New Employee
2) File Import - In order to add Employee Manually, select ‘Create New Employee’.
- A wizard screen will open; this will capture minimum basic details of employee.
- In the first screen enter Details like name, birth date. Text Boxes with light yellow color are mandatory fields. Fill all the details and click next button.
- Employee Code will accept unique value and it can assign either by system or manually. Every employee is identified by Employee Code in the system like for Attendance, Salary, Leave, etc. Hence it is very important.
- In the next screen fill Job details like Joining date, Reporting and Approving Manager then click next.
- In the last screen of the Job organization add Branch, Department, Designation, etc., as per your company’s requirement then click submit. Categories mentioned in Job Organization are created in Categories Screen.
- If the details are correct it will show success message.
For your reference we have presented visual demo, kindly refer the same.
Enrolling employees in bulk via File Import (Template).
- It is best practice to upload employees information through template as it saves lots of time and effort
- In order to enter details in bulk, download template by clicking File Import from Take Action.
- A box will appear, under Data Import section click on Download Template (Mandatory Fields) to create employee with minimum required fields or you may click on Download Template (All Fields), this will give you option to provide all the details.
- An excel file will download, this is system generated Template.
- Open this template and fill the relevant details in the columns as per the headings, Employee Code is important. There is “Sample” sheet available in the Template excel file which will explain you all the fields. You may refer to that sheet for better understanding.
- Some data is mandatory even while uploading through template like Employee Code, Gender, Date of Birth, Employee First Name, Date Of Joining.
- Afterwards upload this file from ‘Data Import File option’ and refresh screen to view new employees.
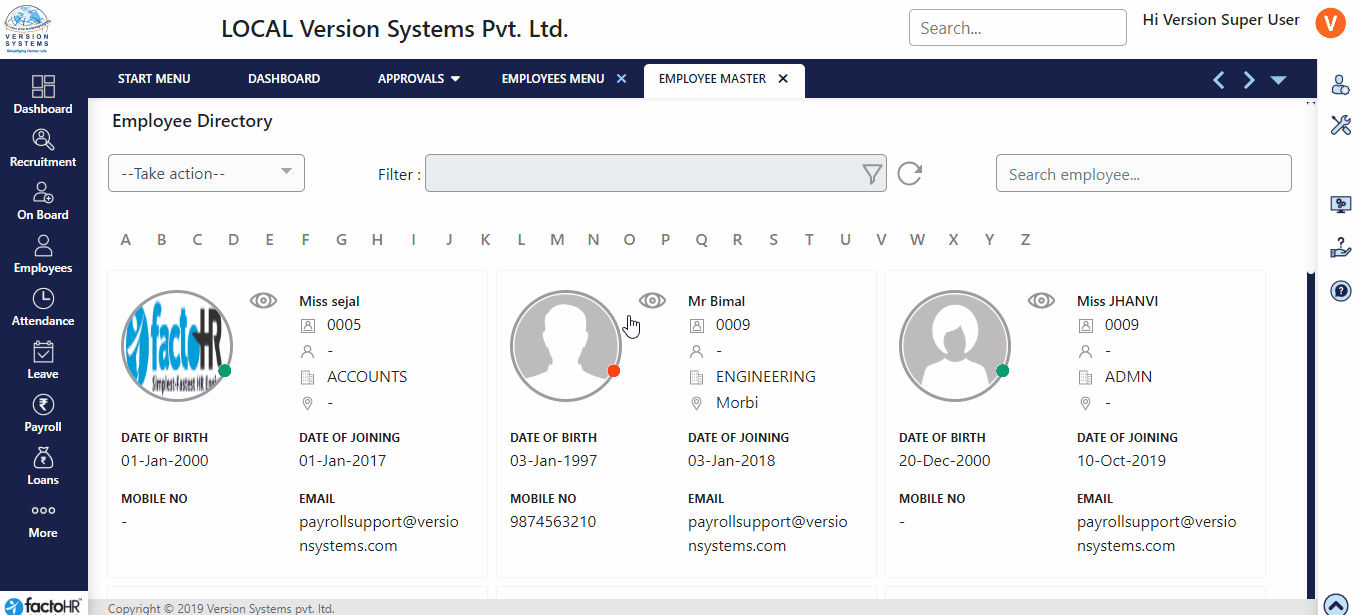
- For all the available employees in Employee Directory, you may click on Arrow button or double click on employee details to open Employee Profile.
For your reference we have prepared visual demo, kindly refer the same.
Edit Employee information / Update empty data (Employee Profile).
- On the upper part of the page you can view their basic information, joining date, organization information, reporting and approving manager, etc.
- There are buttons provided to edit current section, to add new employee or upload file and to reload page.
- On top left corner there is a search box to directly search employee without going back to Employee Directory page.
- Scroll down to go through other parts of information.
- You will find an index on the left side to select particular section. Click on the required link to view or edit the relevant information.
- Each section has edit button on right top corner to edit relevant information.
- About, Joining Details and Organization Info., cover all the basic information about employees, their joining detail, designation, etc.
- From Attendance, settings for punches, overtime or week-off can be configured.
- Document like Identity Proof and others can be saved in Employee Identity. It captures document type, number and also scan image of the document can be uploaded.
- PF & ESIC Details can be saved under Payroll.
- Under Personal Details different kinds of data can be stored like employees address, family details, qualification and others.
- Under Other Detail information like Language known, Skill set, Relatives working in the same company can recorded.
- When employee submits his / her resignation, details can be captured in Resignation section. The section can be made available to employee in ESS portal, where they will be able to put resignation online for their managers to review.
- Document section allows you to upload various document related to Employee and Company. Document uploaded under Employee section, will only be visible to respective employee whereas documents under Company section, will be visible to the employees.
- Whenever any asset like mobile, laptop, etc. are to be assigned to employee then it can be done from Asset option.
- In Bank section you can store employees’ bank details. It includes bank name, account number, IFSC code, etc. This details are useful to generate bank file.
- Many of these sections, depending on the company policy, can be made available to Employee in ESS portal for editing. Once employee edit and submit, it will follow approval workflow based on configuration.
Kindly refer attached small video of the same.
Previous Step:- Categories Next Step:- Salary Master